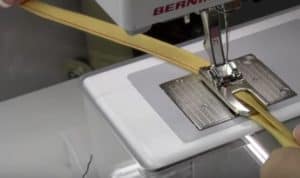
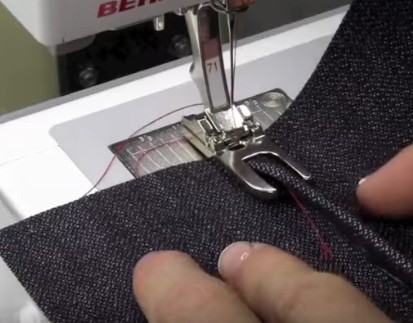
A Flat Felled Seam or Felled Seam is great for use in garment construction. It is the preferred seam in jeans, men’s and women’s shirts and children’s casual garments. The advantage of a flat felled seam is that the seam allowances are encased within the seam leaving no raw edge and with the double rows of stitching it is also very durable.
While this technique can be accomplished without a specialty foot we are spoiled with Bernina and Husqvarna Viking in our store and prefer to use the specialty foot which saves time! Not to mention a Flat Felled Foot can take the fear out of those flat felled seams! The groove in the sole of the foot allows it to run and fell a seam easily and precisely giving the garment a professional finish.
The foot referenced in the Husqvarna Viking foot is the Flat Felled Foot 9mm Part # 413185545. Visit your local Husqvarna Viking Dealer for this foot and additional instruction.
The following videos give all the details for sewing the flat felled seam on a Bernina as well as a Husqvarna Viking.
The feet referenced in the Bernina video are Bernina Foot #70 Part # 008488.73.00 and Bernina Foot #71 Part # 008489.73.00 Visit your local Bernina Dealer to get these feet and additional instructions.
– Transcript –
Have you ever wanted to make those professional seams you see on ready-to-wear-to-wear projects? With the flat felled foot you can create them in two simple steps. Bernina makes two flat felled feet – one with a smaller groove for more delicate fabrics with a 4mm finished size as well as an 8mm wide foot that finishes for heavier fabrics.
A flat felled seam is achieved in two simple seams. If you don’t have a serger or you just want that nice finished seam on the back you will notice that there are no raw edges when you are done.
Starting with the larger 8mm flat felled foot, begin by positioning the fabrics WRONG sides together with the lower fabric extending about 1/2” over the edge. To start fold the lower fabric over the edge of the top fabric and slide under the flat felled foot for the first seam. Once started see if the needle position needs to be adjusted closer to the raw edge.
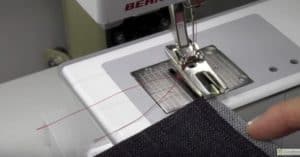
Once the seam is started, sink the needle into the fabric, raise the foot and guide the folded edge into the opening of the foot. The machine is going to do the work for you at this point!
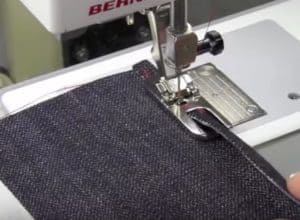
Now for the fun part. You don’t even have to press it! Just flatten the sewn edge toward the left and feed it into the foot again. It will again guide the fabric perfectly without much work. Both seams finish perfectly parallel to each other like you have used an edgestitch foot.
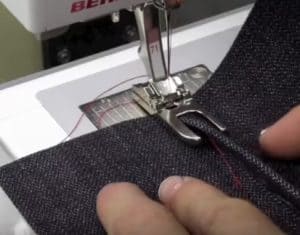
Select other stitches like the Triple straight stitch or use a thicker thread for more dramatic results.
For finer fabrics, select the smaller 4mm flat felled foot. Again, position the fabric WRONG sides together with this time with a much smaller amount of extended past the top fabric.
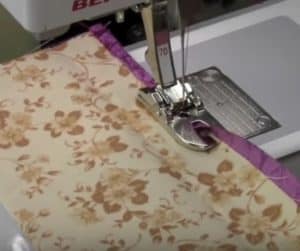
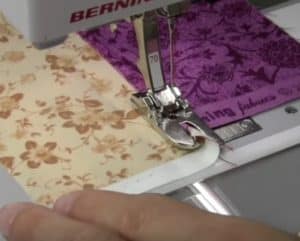
Side Note: The sewing stitches for a flat felled seams need to have perfect tensions. Plan to use the same thread in the needle and bobbin since one seam you will see the bobbin thread when finished and the second seam you will see the needle thread. Using the sample weight of thread top and bottom will help with achieving perfectly balanced stitches.
For inspiration of where to use a lap seam, just look in your closet! Many garments are completely constructed using only a flat felled seam.
If one flat felled seam will cross over a previously sewn flat felled seam, it is recommended to the seam from the foot, finish crossing over the bulky part, and then reload the flat felled seam back into the foot.
Gentle curves are also possible with a flat felled foot for sleeves and arm holes.
BONUS – How to make flat felled ties
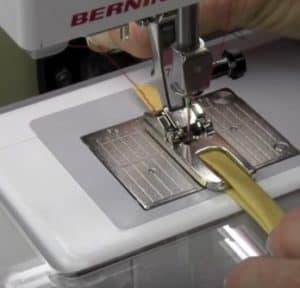
Start with the larger 8mm flat felled foot and a pre-folded 1” strip of fabric. Move needle position as needed based on the fabric thickness. Fold the raw edges to the center fold, slide under the presser foot and begin sewing.
